Showing posts with label Game Development. Show all posts

04 July, 2024

Which all files and folders to backup to zip a Unity Project


In order to be able to recreate the Unity Project from a backup zip, just remove Library and Temp folder when backing up the project to a zip file.


This will significantly reduce the zip size.

21 September, 2023

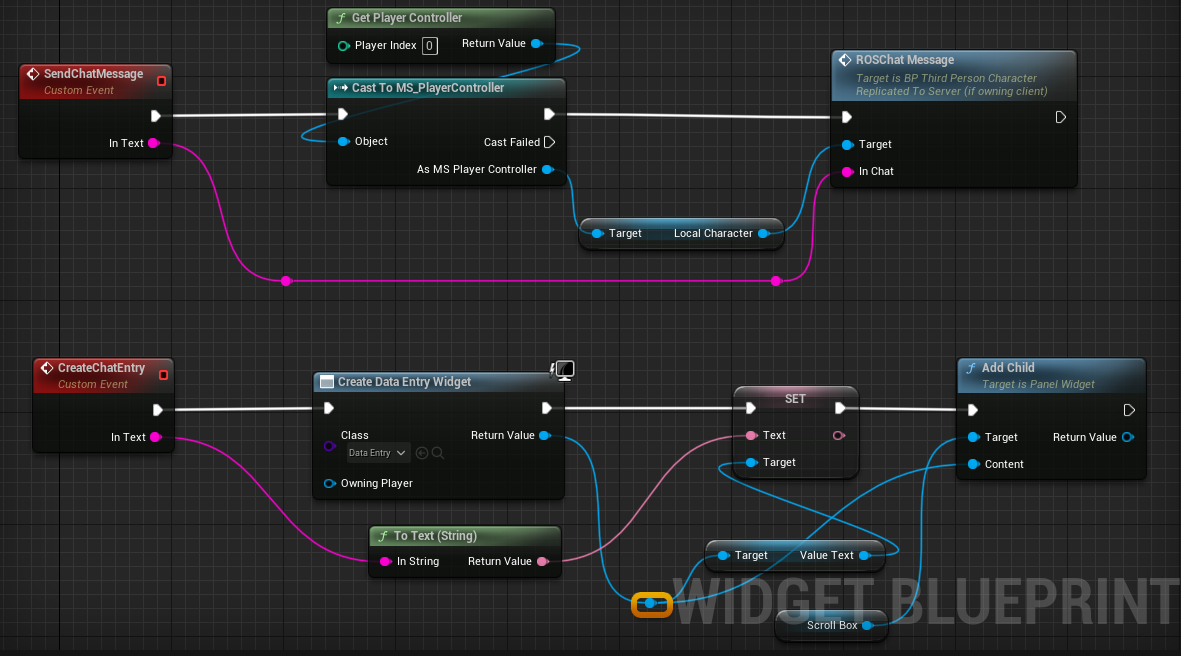
How to make RPC in Unreal Engine Steam Online Subsystem and EOS

Remote Procedure Calls, also known as RPCs, are a way to call something on any other instance. 

In the Unreal Engine, RPCs are used to ship events from the patron to the server, the server to the customer, or from the server to a specific group.

It's important to word that RPCs cannot have a return cost. If you want to return something, you'll ought to use a seconds RPC within the contrary path. There are precise policies that RPCs observe, which are unique in the official Documentation. Some of these regulations encompass wherein the RPC must be run, such as the server instance of an Actor, on the owner of the Actor, or on all instances of the Actor.

There are some necessities for RPCs. First, they must be referred to as on Actors or replicated Subobjects. The Actor (and component) have to additionally be replicated. If the server is looking an RPC to be executed on a customer, handiest the patron who owns that Actor will execute the function. Similarly, if a client is calling an RPC to be performed at the server, the client. ought to very own the Actor that the RPC is being called on.

There is an exception for Multicast RPCs. If they are known as through the server, they will be achieved at the server and on all presently related clients which have an instance of the applicable Actor. However, if they are called from clients, the Multicast will handiest execute domestically and will not execute at the server or different clients.


29 May, 2023

How to fix clothes flickering in Unreal Engine 5.

 This issue can be noticed some of the character clothes when using Paragon Characters in UE5.


To fix the flickering issue, Use Self Collisions checkbox in collisions properties under the Static Mesh option of your character.


Open the character model go to 

 Asset Details > Clothing Properties - Cloth Config - ChaosClothConfig - Collision Properties - Use Self Collisions > False


20 January, 2020

How to dynamically create object using JSON data from REST API in Unity 3D

Over the years Unity has become all very powerful and not just easy. With it's easy to use interface and handy programming language C# it is one of the best possible IDE out there to make applications and not just games.

With the help of SimpleJSON and Unity Networking class you'll see how easy it is to handle web requests in Unity.

So today we are going to fetch and display data from REST API request. By displaying data I don't just mean showing the raw output of JSON but making the objects out of the response data which could be further used as per your requirement.

Let's get started.

First you need to make an API which will return some set of data. For example returning a user's friend list data will contain name, age, joining date of all their friends.
For creating an API you may follow my NodeJS tutorial

Once you have some API let's create a simple Unity application that will make a web request on Button click.
Go to a scene in Unity > Right click in the hierarchy and create a UI > Button.


Leave this be for now and let's create a script that will carry the function of this button.

In you 'Assets' folder create a new folder by the name 'Scripts' for keeping all our scripts.
Inside this folder right click and Create > C# script. Let's name this filer 'API.cs'

Inside API.cs create a method of a name of your choice which will start a coroutine upon call.

public void OnClickSendReq()
    {
        StartCoroutine(WebRequestCoroutine("parameter"));
    }


Now before we define this coroutine we first need to add support for Unity Networking.
Add 'using UnityEngine.Networking; in the beginning of the script.

Now we define our coroutine.
 IEnumerator UpdateReferredUsersList(string userId)
    {
        WWWForm form = new WWWForm();
        form.AddField("username", userId);

        using (UnityWebRequest www = UnityWebRequest.Post(APIURL, form))
        {
yield return www.SendWebRequest();
            if (www.isNetworkError || www.isHttpError)
            {
                Debug.Log(www.error);
               
            }
            else
            {
Debug.Log(www.downloadHandler.text);
}
}
}


This coroutine requires creates a web form using WWWForm and adds a form field 'username' with a value that is passed using the variable userId.

  WWWForm form = new WWWForm();
        form.AddField("username", userId);  


Then using UnityWebRequest we make a Post request on APIURL with the form.
  using (UnityWebRequest www = UnityWebRequest.Post(APIURL, form))

Then the response is handled in the next step.
Now we need to create Unity Game Objects using the data response from the API call. For that we first need to handle the data that is coming. In my case the response data is in JSON. 
To handle JSON data we'll be using a SimpleJSON. It is recommended to get it from the official website but in case you find it uncomfortable you may use a copy I uploaded to Github.

Now create a folder by the name 'Plugins' inside the 'Assets' folder and paste SimpleJSON file in there.


Now go back to editing API.cs and add 
  using SimpleJSON;
to the beginning.

Now in order to handle/parse the JSON data coming from our API response we need to create a Request object.
For this we'll be making a custom class. Add the following code to the extreme bottom of API.cs

public class RequestStatus
{
    public string status;
    public string msg;

    public static RequestStatus CreateFromJSON(string jsonString)
    {
        return JsonUtility.FromJson<RequestStatus>(jsonString);


    }

}


Now back to our coroutine inside the else block web request error checking add 

                int i = 0;
                while (i >= 0)
                {
                    string userExists= JSON.Parse(www.downloadHandler.text)["data"][i]["username"].Value;

                    if (
userExists  != "")
                    {
                                                   ListUserData(JSON.Parse(www.downloadHandler.text)["data"][i]["first_name"].Value,
                            JSON.Parse(www.downloadHandler.text)["data"][i]["username"].Value,
                            JSON.Parse(www.downloadHandler.text)["data"][i]["email"].Value
                        i++;
                    }
                    else
                    {
                        i = -1;
                    }
                }

This block of code will loop through all the data under 'data'  you might have to modify 
  JSON.Parse(www.downloadHandler.text)["data"][i]["username"].Value; 
according to the response of you API.

Now to create objects using the response data we called a method with the values of individual set of data.
In this method ListUserData we will instantiate a prefab that will hold the data of individual set.

Create a new method within the else block

                void ListUserData(string username, string email)
                {
                    Debug.Log("Listing users data by instantiating prefab!");
                    GameObject listingObject= Instantiate(userlistPrefab, userlistContainer);
                    UserListing userListing= 
listingObject.GetComponent<UserListing>();
                    userListing.PopulateUserData(username, email);

                }


Now this method will instantiate a prefab 'userlistPrefab' as a child object of 'userlistContainer'. 
We don't just want to instantiate an object but want the data to be displayed on this object. For this we will create a new class 'UserListing' which defines the listing object structure and will have a method 'PopulateUserData' for updating the values of the object.

Head back to Unity and inside Assets > Scripts > Create a new C# script UserListing.

Now inside UserListing 

using UnityEngine.UI;
public class UserListing : MonoBehaviour
{
    [SerializeField]  private Text username;
private string email;

public void PopulateUserData(string usernameInput, string emailInput)
    {
        username.text = usernameInput;
        email = emailInput;
    }
}


Now let's create our userListingPrefab to which UserListing class will be applied to.
To create a prefab head back to the scene in Unity and create an Empty GameObject 'UserScrollRect' inside the Panel.
There must a Panel under the Canvas already if you created a button in the very beginning of this tutorial.
If it is not there create a button now and redo the above step.
In the Inspector tab of UsersScrollRect click Add Component and add a Scroll Rect(script).
Uncheck Horizontal.


Now create a child object to UsersScrollRect by the name UserDataContainer which will hold all the prefab object we'll create next. Stretch and set position UserScrollRect according to your need. 
Add Vertical Layout Group (Script) to UserDataContainer.


Under UserDataContainer create a child object, preferably a UI > Image
Stretch it according to your need and Add a UI > Text Object to it. This will be carrying the username from the script.
Add UserListing script to UserListing Object.


Drag and drop Username text object in the blank field against Username in the script properties. In my case it says Name Text as this screenshot was taken later. So I hope this will not confuse anyone.

Once added drag and drop the UserListing object from Hierarchy to Prefabs folder in Project tab.

Create a new Empty Game Object, let's name it 'WWW' and attach API.cs we created above.
Add 
    [SerializeField] private GameObject userListingPrefab;
    [SerializeField] private GameObject UserInformationPanel;


to API.cs and drag and attach the prefab we created.
For the UserInformationPanel game object we have to add UserDataContainer we created above.

Open the inspector tab of our button and add  OnClickSendReq to be executed on click.


You might have to set up the objects hierarchy according to your need. I'll leave that to you.

Feel free to leave a comment if you need any help with this.


12 June, 2019

How to make neon light signs in Unity 3D

As part of my game, I was trying to create a whole apartment like environment. I decided to call it a motel instead. So I had to put a sign saying it's a motel(how else would people know right?)

To create the simple glowing text you need text mesh pro. It's available in Asset Store as well as in Unity Package manager.

Inside Unity, go to Window > Package Manager and search for text mesh pro.


Now go to Game Object > 3D Object > Text Mesh Pro Text


Now enter whatever text you want and select distance field shader in text mesh pro inspector tab. See image below.

Once selected you'll be able to see a number of settings under shader and can enable glow from there. I'd recommend playing with numbers here to suit your scene. 

Now that you have your glowing text if you want more you'll notice they seem to be using the same shader which will cause a problem if you want glow signs in different colours. For this, we need to create a duplicate of the font asset we are using and use different font asset for different text signs.


Under the text mesh pro settings you'll find Text Mesh Pro(Script) under that you'll find font asset. 


You can either duplicate a previous font asset or create a new one using a different font. To create a font asset go to Window > Text Mesh Pro > Font Asset Creator.

 
Under Font Asset Creator tab select source font file and generate atlas and don't forget to click on Save Font asset under that.


Once the font asset is created you can switch Font Asset in Text Mesh Pro settings and that will use the shader associated with this font asset. 
Just make sure you use a different font asset for every glow text of different shade.


10 June, 2019

Making Sensor Lights in Unity 3D

Lighting in Unity 3D can some times get tricky. I just spent hours into making sensor lights only to come up with a very obvious solution.
At first, I was using baked maps which were the primary reason for my trouble.

I know it's kind of obvious but I need to state it for anyone who is struggling with the same.

Don't use Baked Lightmaps if you want real-time illumination.

As simple as that. I even considered lighting up the environment by real-time switching different lightmaps. Thanks to the complexity of such task I didn't do it.

Finally, the solution was to use simple point lights. To give the lights better look I used emissive materials.

Here are the results.


Here's how I did it.


  • Created an empty Gameobject Light Controller and under that created two small cuboid, LightsOn and LightsOff and a point light called Bulb here.
  • Added a box collider in Light Controller and ticked Is Trigger.
  •  
Here's the script attached to the Light Controller.


public class LightsOn : MonoBehaviour
{
    public GameObject lightOn, lightOff, light;
    private bool lightsOn = false;

    private void OnTriggerEnter(Collider other)
    {
        if(other.tag == "Player" || lightsOn == false)
        {
            lightOn.SetActive(true);
            lightOff.SetActive(false);
            light.SetActive(true);
        }
    }

    private void OnTriggerExit(Collider other)
    {
        if (other.tag == "Player" || lightsOn == true)
        {
                lightOff.SetActive(true);
                lightOn.SetActive(false);
                light.SetActive(false);

        }
    }

}


What this script does is, take checks if the Player enters the trigger collider and enables lightsOn object and bulb(light) and disables lightsOf object and bulb(light) and vice versa.

I also created two emissive materials with the following the property. They're just new material with albedo set to white and HDR Color set to white in lit up light(cuboid object above) and Black in dim light.


In case my naming of objects and variables is causing any confusion, there is two sources of light in this, cuboid and a point light. Originally I wanted to just light up the room using cuboid with emissive material but that doesn't work in real time lighting as they need to be baked. So I ended up using a point light to illuminate the room in real time and cuboid with emissive material to make it look better.

Hope this helps anyone looking into sensor lights. In case of any query feel free to comment below.


Featured Post

Content Writing VS Content Marketing: How are Both Different From Each Other?

Regardless of how long the businesses have been introduced to digital marketing, it is often seen that they confuse the terms of marketing. ...