If you are going to learn PHP programming you will need to run a server that hosts your PHP pages. For doing this there are multiple ways. All of them are nothing but server applications that run an Apache server on your system, For some reasons I find installing the Apache server itself bit confusing. But that can be worked around by using WAMP or EasyPHP.
If you are getting "msvcr100.dll missing" error see this.
1. Going with EasyPHP download the latest EasyPHP Dev Server from their official site, here. As of writing this the latest is 16.1.1
2. Go with the default installation. Which will install in the directory of your windows.
3. Once installed you will see an EasyPHP tray icon as shown.

4. Right(or left) click the tray icon and click Open Dashboard. Which will open up a page in your Web Browser as shown.

5. Once we got the all we have to do is start the service we need. Since we want make PHP pages, click start under HTTP SERVER. If there are multiple choices of the server as shown below go with anyone. I went with the first one which starts with 32 bit server. I guess the other choices would have done the same.


<?php
$testPhrase= "Hello World!";
echo $testPhrase;
?>
If you are getting "msvcr100.dll missing" error see this.
1. Going with EasyPHP download the latest EasyPHP Dev Server from their official site, here. As of writing this the latest is 16.1.1
2. Go with the default installation. Which will install in the directory of your windows.
3. Once installed you will see an EasyPHP tray icon as shown.
4. Right(or left) click the tray icon and click Open Dashboard. Which will open up a page in your Web Browser as shown.
5. Once we got the all we have to do is start the service we need. Since we want make PHP pages, click start under HTTP SERVER. If there are multiple choices of the server as shown below go with anyone. I went with the first one which starts with 32 bit server. I guess the other choices would have done the same.
Now let everything in default and Start it.

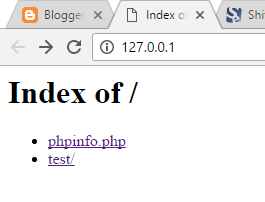
6. Once started you can check whether your server is running or not by opening the local host of your computer. To open local host, just type "localhost" (without quotes) in the address bar of your web browser or just click this http://127.0.0.1/
If you don't see any error means everything is working fine.
7. Now this localhost is a location in your system which is present in the installation directory of EasyPHP. Go to the installation directory and find the Folder by the name "www" or "eds-www" in my case.
7. Now this localhost is a location in your system which is present in the installation directory of EasyPHP. Go to the installation directory and find the Folder by the name "www" or "eds-www" in my case.

Open this folder and you will find a phpinfo.php file there. Let it remain there. Now we will work with our php files in this "www" folder.
You can create as many subfolders you want. Like I created a "test" folder for the sake of testing.
You can create as many subfolders you want. Like I created a "test" folder for the sake of testing.
8. Now create a PHP file.
I did by this code:
I did by this code:
<?php
$testPhrase= "Hello World!";
echo $testPhrase;
?>
Copy it and save the file by the name "index.php"
Place this file anywhere in the "www" directory of EasyPHP as shown.
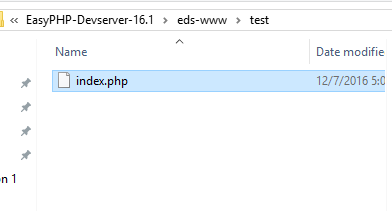
Place this file anywhere in the "www" directory of EasyPHP as shown.
I placed the index.php in the subfolder "test" I created.
9. To test my code is working we open the localhost in the web browser and head over to the "test" directory.
9. To test my code is working we open the localhost in the web browser and head over to the "test" directory.
Upon clicking the "test" subfolder I get my code running.

That's it.
That's it.


No comments:
Post a Comment