PHP and MySQL always go side by side. Now if you are going to build a PHP website that would be saving any kind of that you will need a database to store that data. MySQL is that database which will be saving your data, and to access, modify or save data in this database you need SQL which stands for Structured Query Language.
Now if you are aware of the previous post we are going to use EasyPHP for our work here as well.
Considering you have installed and configured EasyPHP from previous post. Lets get started with MySQL.
1. First of all open the EasyPHP dashboard by right(or left) clicking the EasyPHP tray icon.

2. Now click on Start under Database Server to start a database server.

3. If you find multiple option go with any I went with the first.

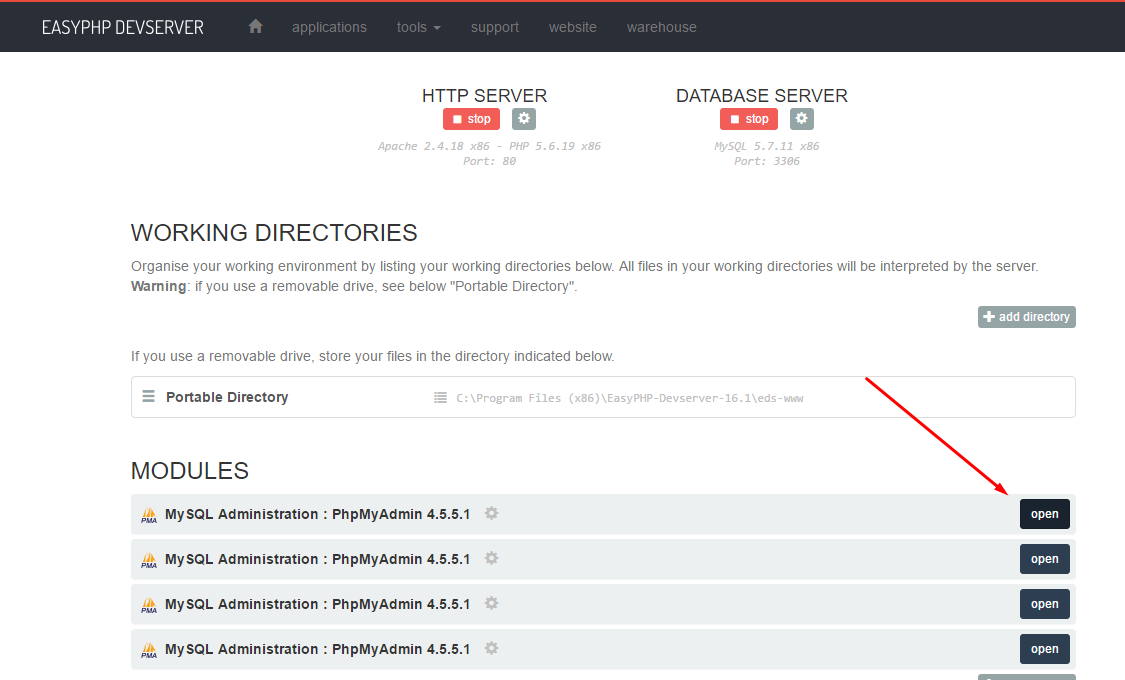
4. Once started we need to run queries. To do so we need PHPmyAdmin.
Go to the EasyPHP dashboard again and there you will find MySQL Administration PHPmyAdmin as shown.
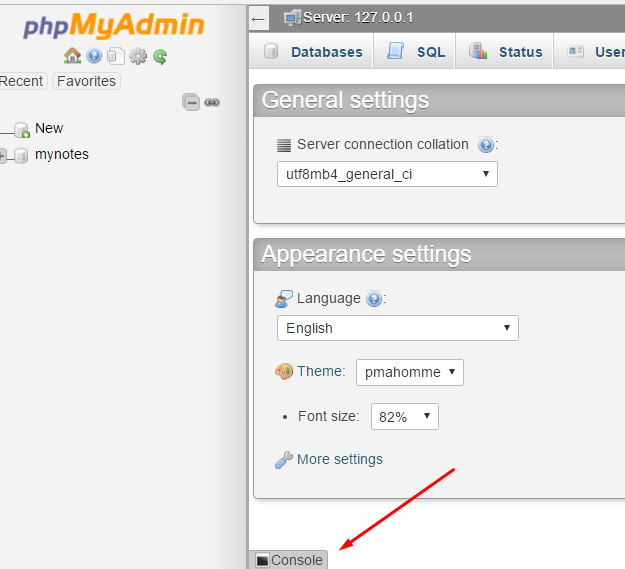
5. Upon opening you will find the PhpMyAdmin dashboard. To execute your SQL commands you have to open console which is at the bottom of the Window as shown.
6. Let's execute our first query to see what all databases are already there.
mysql> SHOW DATABASES


Following SQL query will create a table.
mysql> CREATE TABLE myTable (
Now if you are aware of the previous post we are going to use EasyPHP for our work here as well.
Considering you have installed and configured EasyPHP from previous post. Lets get started with MySQL.
1. First of all open the EasyPHP dashboard by right(or left) clicking the EasyPHP tray icon.
2. Now click on Start under Database Server to start a database server.
3. If you find multiple option go with any I went with the first.
And click on start.

Go to the EasyPHP dashboard again and there you will find MySQL Administration PHPmyAdmin as shown.
5. Upon opening you will find the PhpMyAdmin dashboard. To execute your SQL commands you have to open console which is at the bottom of the Window as shown.
6. Let's execute our first query to see what all databases are already there.
mysql> SHOW DATABASES
Upon doing that I got the list of databases I already have. Out of these "mynotes" is the database I have made previously.
That's it. Now you are good to go. Create your own database, tables and enter data into that.
Let's do some queries now.
Let's do some queries now.
Since all of the data is always placed in a database, we need to first create a database.
To do that query mysql
mysql> CREATE DATABASE mydb;
To do that query mysql
mysql> CREATE DATABASE mydb;
Here mydb is just a name and you can use any name of your choice as you like.
Now the information in a database is stored in the tables. We need to create a table for that.
Now the information in a database is stored in the tables. We need to create a table for that.
But before we create a table we need to specify in MySQL that we want a table to be created in the database we just created. In order to do that we query
mysql> USE mydb;
Following SQL query will create a table.
mysql> CREATE TABLE myTable (
columnOne INT NOT NULL PRIMARY KEY,
columnTwo TEXT,
columnThree DATE
);
columnTwo TEXT,
columnThree DATE
);
This will create a table with three columns with the names columnOne, columnTwo and columnThree respectively.
You can use the query
You can use the query
mysql> DESCRIBE myTable;
to see how your table looks like.

Now there are two ways of inserting data into these tables.
1.
1.
mysql> INSERT INTO mytable SET
columnTwo = "Any textual message here!",
columnThree = "2016-12-8"
2.
mysql> INSERT INTO mytable (columnTwo, columnThree)
VALUES("Like I said any thing textual!", "2016-11-7")
You must have already noticed that I did not enter anything for columnOne, infact I did not even mentioned it in my queries. It is because I made that column NOT NULL and set it to AUTO_INCREMENT when I defined the table.
Now to check out our table content we query
mysql> SELECT * FROM myTable
mysql> SELECT * FROM myTable
That's all. Your table is up and running your database.
If you are confused as to use the semi-colon or not, it does not matter.
If you are confused as to use the semi-colon or not, it does not matter.


No comments:
Post a Comment